Saturday, March 19, 2016

Steampunk Lamp

In general I am hoping to build things that don't really fit the label of "steam punk" or if they do then they should have some feature that sets them apart from run of the mill. On the other hand, when a friend came to me and said, "I have room in my booth at the game convention if you can pull together one or two steam punk items." It made sense to go that direction.


As a side note... This little blog just hit 1000+ page views.


Tuesday, March 15, 2016

Wrap up one and unwrap the next one.

The pendulum project is nearly complete and ready for presentation.


A photo like this doesn't do it justice, but it gives you the idea. Perhaps a video will be forthcoming.


For unwrapping the next one...  I got a quick lesson on using the sandblaster. I started "unwrapping' a cast iron lamp base that was covered with chipped paint and rust.  Now it can become a lamp base with a whole new lease on life.

Tuesday, March 8, 2016

Progress happens even with mistakes

I decided to use the linseed oil and am quite pleased with the results I got wet sanding the oil. On the oops side of things, I wanted to protect the  wood for overnight storage. Surely a sponge  would make a nice cushion for the wood to rest on. It turns out that a sponge soaks up the linseed oil and leaves a discolored spot on the wood. Lesson learned.


Since this project is going to use several clock motors I decided it would better to run them all from one set of batteries instead of lots of individual ones. To make this happen I need to solder leads to each motor. This is made difficult by the fact that the contact points for the batteries are spring steal. Not a practical surface to solder to. At the end of the day, after several failed attempts, it occurred to me I could put an aluminum pop-rivet through the contact, and have a usable surface. I'll give that a try first thing tomorrow.

Thursday, March 3, 2016

The next project is underway

Gathering the needed supplies,


and making difficult decisions about which oil finish to use on the walnut.


I found this article about wet sanding the finishing oil.  I'm going to try that (option #2) on a sample piece too.


Thursday, February 25, 2016

Finding good vendors

The variety of hardwood suppliers in Indianapolis has dwindled over the years but fortunately the best is still in business. Northwest Lumber always has a good selection of domestic and exotic hardwoods.


On the other side of the coin, I haven't had a good history with metal suppliers. They seem uninterested in small orders and become somewhat impatient if you don't speak the language. The vocabulary required to specify thickness, hardness and the myriad of details needed to ask for a piece of metal is specialized to say the least. Those difficulties went away yesterday when I visited Metal Supermarkets


Not only were they willing to talk to me about a small order, they told me that about half of their business is small orders. I was looking for a sheet of aluminum about 1/8 inch thick. They showed me their selection of end cuts. The one I bought was more than 5 square feet and priced at $2.50 per pound. They were just as willing to cut a piece to order which would have been priced dimensionally.
    They spent a good amount of time with me explaining the various options and quality grades they had available. Thanks guys, I'll be back.


Monday, February 8, 2016

Progress at the studio


The studio still needs a little more shelving and a lot more organization but it was fun to get the logo on the door today.


Thursday, January 28, 2016

Lamp is nearing completion


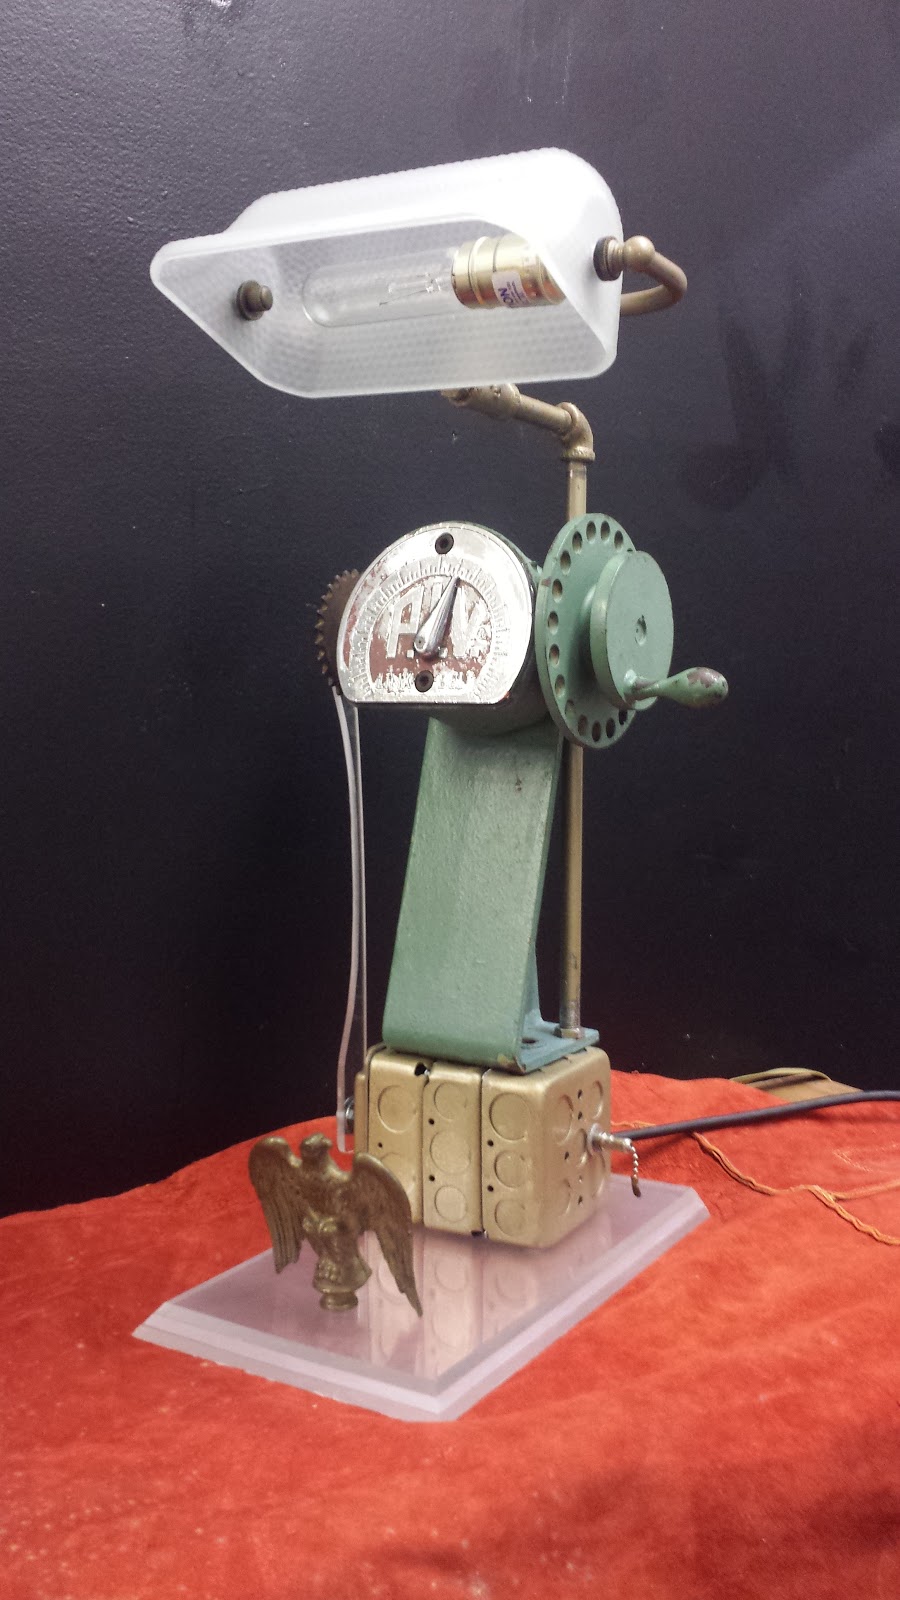
This interesting piece of hardware was the inspiration for this project. I don't know what it was originally used for, but it does have the Link Belt brand name and the P.I.V. logo. A little research leads me to believe that P.I.V. stands for Positive Infinitely Variable and probably has something to do with a variable speed motor control.


One feature of this lamp is a glowing (lighted) base. A few LEDs imbedded in acrylic should do the trick.  


Miscellaneous electrical components and a vintage glass shade will help too.


When its all put together it looks something like this:


Special features to note: Turn the crank to adjust a dimmer switch for lamp brightness.


 The switch on this side turns on the LEDs that make the base glow.


There are a few more finishing touches to put in place before this project is complete, but it is so close that I am anxious to talk about it.